
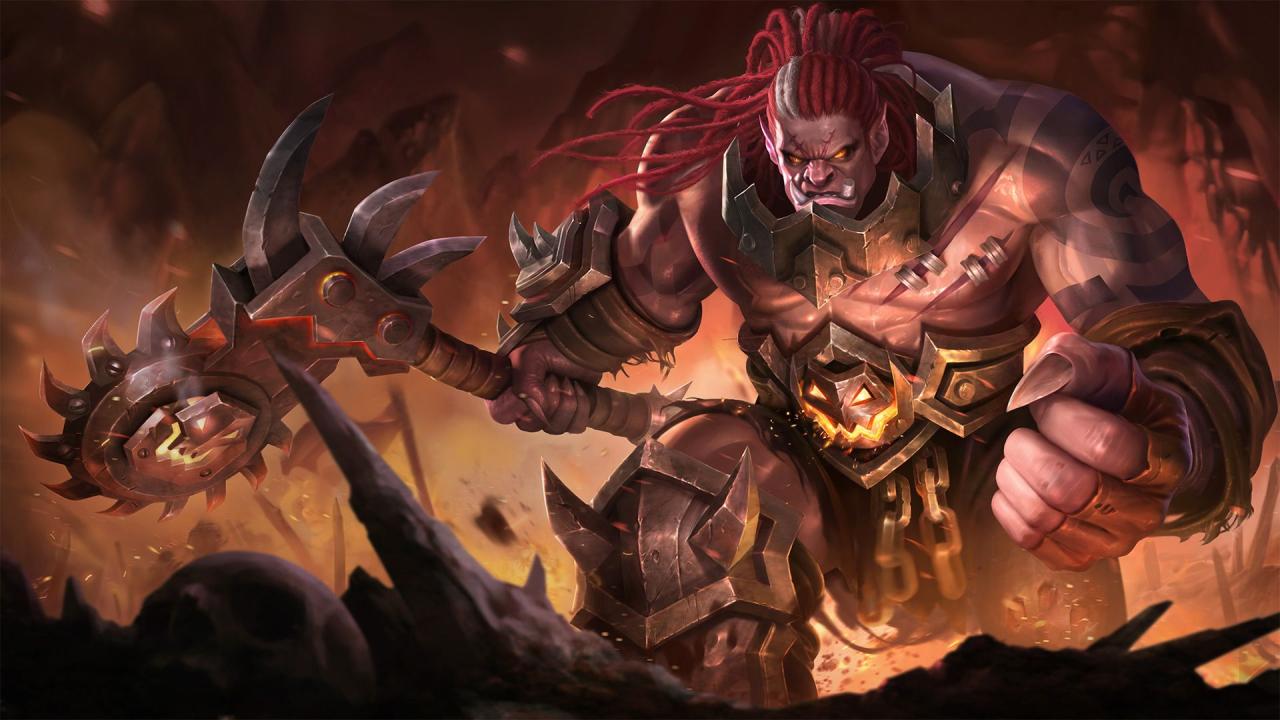
Introduction: Embracing the Frenzy of the Blood Axe
The world of Mobile Legends: Bang Bang is constantly shifting, defined by the delicate balance of complex heroes and ever-changing battlefield tactics. Amidst the chaos of flashy mages and elusive assassins, Balmond, the Berserker stands as an enduring pillar of brute force and surprising survivability. Often underestimated, this Fighter/Tank hybrid offers a potent blend of area-of-effect damage, crucial crowd control, and a unique passive ability that makes him one of the most sustainable heroes in the entire game.
Mastering Balmond is not about outmaneuvering opponents with intricate combos, but rather about positioning, timing, and understanding the sheer tankiness his passive provides during prolonged fights. He serves as an excellent hero for players transitioning from the tank role into the fighter role, or for veterans who appreciate a straightforward yet strategically deep hero capable of turning around disastrous team fights. This comprehensive guide will dissect every aspect of Balmond’s gameplay, ensuring you can fully unlock the potential of his mighty Axe, dominating your lane and becoming an unstoppable presence in the late game.
Pillar 1: Understanding Balmond’s Unique Toolkit
Balmond’s strength lies in the synergy between his skills, which allow him to deal damage while simultaneously managing his own HP pool, making him frustratingly difficult to eliminate.
A. Passive: Soul Lock (The Core of His Sustain)
Balmond’s passive is the secret ingredient that makes him a terrifying fighter, granting him significant HP recovery upon securing kills.
-
Minion Mastery: Every time Balmond secures the killing blow on a minion or jungle creep, he recovers $5\%$ of his maximum HP. This makes him highly durable in the lane and crucial for split-pushing.
-
Hero/Assist Bounty: When Balmond secures a kill or an assist on an enemy hero, he recovers $20\%$ of his maximum HP. This massive burst of healing often allows him to turn a lost fight into a triumphant multi-kill.
-
Sustain Strategy: This passive encourages Balmond to stay active in the early game, consistently clearing waves and jungle camps to maintain high health, reducing the need for frequent trips back to the base.
B. Skill 1: Soul Lock (The Escape and Chase)
This skill provides Balmond with the mobility and initial crowd control he needs to engage or disengage effectively.
-
Dash and Slow: Balmond charges forward, dealing damage and knocking back the first enemy hero he hits, which is invaluable for disrupting channeled skills or repositioning enemy targets.
-
Escape Mechanic: It’s the only true mobility tool in his arsenal; learning to use it to escape dangerous ganks or reposition after a fight is crucial for survival.
-
Setup Tool: The knockback can be used to shove an enemy directly into the path of a powerful ally skill or closer to a turret, setting up an easy kill.
C. Skill 2: Cyclone Sweep (The Area Damage Engine)
This is Balmond’s primary source of continuous damage and his most resource-efficient skill for clearing waves.
-
Continuous Spin: Balmond spins his axe for multiple seconds, dealing escalating damage in an area around him. The damage increases with each hit on the same target.
-
Wave Clear and Sustain: Paired with his passive, using Cyclone Sweep on a minion wave guarantees Balmond full HP sustain almost instantly, making him very difficult to push out of his lane.
-
Damage Scaling: Since the damage is continuous, Balmond is an effective counter against close-range melee heroes who rely on short bursts of damage.
D. Ultimate: Lethal Counter (The Execution Tool)
Balmond’s ultimate is a massive, high-impact area-of-effect skill that should be used as an execution tool, not an initiator.
-
True Damage Execution: Balmond slams his axe down, dealing a massive amount of Physical Damage plus a percentage of the target’s missing HP. This is why it is used to finish low-health targets.
-
Slow and Disruption: The ultimate slows enemies caught in its radius, adding crucial crowd control to a team fight.
-
Objective Stealing: The sheer burst damage makes it one of the best skills in the game for stealing the Lord or Turtle when timed perfectly, as it can be deployed from a relatively safe distance.
Pillar 2: The Optimal Balmond Itemization (Build Guide)
Balmond needs a careful balance of durability and damage. Since his ultimate scales with missing HP, adding raw damage is not always the best solution; maximizing his survivability to keep Cyclone Sweep spinning is key.
A. Core Item Strategy: Sustain and Penetration
These items should be prioritized in the early and mid-game to solidify Balmond’s role as a durable damage dealer.
-
Boots of Swiftness/Warrior Boots: Typically, Warrior Boots are chosen for the Physical Defense, allowing him to trade better in the lane. Boots of Swiftness can be an alternative if the enemy team lacks early Physical Damage and you want faster clear speed.
-
Bloodlust Axe: This is arguably Balmond’s most important item. It grants Spell Vamp, which translates the damage from his Cyclone Sweep and ultimate into massive personal healing. The higher the damage, the more he heals, exponentially increasing his survivability during team fights.
-
War Axe: This item provides a crucial balance of Physical Attack, cooldown reduction (CDR), and Physical Penetration. Its unique passive stacks both damage and Movement Speed, enabling Balmond to keep chasing targets while spinning.
B. Defensive Power Spikes: HP and Resilience
Once the core damage items are secured, Balmond must transition into defensive items to survive the late-game burst damage.
-
Oracle: This item is perfect for Balmond because it increases his shield and HP regen effects. This buff directly strengthens the healing from his passive and the Spell Vamp from Bloodlust Axe, turning him into an unstoppable regeneration machine.
-
Brute Force Breastplate: Provides HP and Physical Defense. Crucially, its passive grants a stacking buff of Movement Speed and Physical/Magic Defense after using a skill or a basic attack, ensuring Balmond can chase or escape while he’s spinning his axe.
-
Antique Cuirass: Essential against teams with multiple Physical Damage fighters or assassins. It reduces the opponent’s Physical Attack when Balmond is hit, drastically cutting down their burst potential.
C. Late Game Flex Options
The final two slots should be chosen based on the enemy team’s primary damage source and composition.
-
Against Magic Burst (Immunity): Athena’s Shield for massive Magic Damage reduction and a shield, or Radiant Armor against continuous Magic Damage (like Chang’e or Lunox).
-
Against High Physical Crit: Blade Armor for massive Physical Defense and its passive, which reflects damage back to the attacker.
-
If You Need More Damage: Hunter Strike for a quick burst of Movement Speed after getting five consecutive attacks, perfect for rotating or hunting down low-HP targets.
Pillar 3: Mastering the Lane and Early Game Rotation

Balmond’s early game should be focused on securing the advantage in the EXP Lane and establishing dominance through consistent farming.
A. EXP Lane Dominance (Phase 1: Level 1-4)
Your objective is to reach level 4 and unlock your ultimate as quickly as possible, giving you global pressure.
-
Prioritize Skill 2: Upgrade Cyclone Sweep first. Use it to clear the minion wave rapidly and deal continuous damage to your opponent simultaneously.
-
Sustain Advantage: Constantly last-hit with Cyclone Sweep to trigger your passive healing. Do not waste the passive healing by standing away from dying minions.
-
Aggressive Zoning: Use your superior sustain to stand aggressively between the enemy laner and their minion wave, forcing them to choose between taking damage or missing gold and experience.
B. The First Rotation (Phase 2: Level 4 Onwards)
Once the ultimate is unlocked, Balmond becomes a threat in every lane. Your focus shifts to objective control and ganking.
-
Turtle Priority: After clearing your wave, look immediately to assist your team in securing the Turtle objective. Your ultimate is an excellent tool for dealing massive burst damage to the Turtle or stealing it from the enemy.
-
Mid-Lane Gank: Use the brush to sneak into the mid-lane. Lead with your Soul Lock (Skill 1) to knock the enemy mid-laner back towards your ally, then follow up with Cyclone Sweep. Use the ultimate only when the target is low HP for the execution damage.
-
Jungle Invasion: If your team’s rotation is successful, look to steal the enemy’s jungle camps. The combination of Cyclone Sweep and the passive healing makes jungle clearing incredibly fast and safe.
C. Securing Turret Advantages
Balmond is great at creating pushing pressure that the enemy must respond to.
-
Push and Roam: Never commit fully to an outer turret unless the enemy is dead. Push the wave to the turret, deal a few hits, and then immediately rotate to join a team fight, forcing the enemy to decide between defending the tower or helping their teammates.
-
Split-Push Safety: Use Soul Lock (Skill 1) as a defensive tool when split-pushing. If two or more enemies approach, use Skill 1 to knock them back and dash over a wall to escape safely.
Pillar 4: Advanced Team Fight Positioning and Execution
Balmond’s role in a large team fight is not to dive the backline, but to act as a powerful frontline disruptor and finisher.
A. The Frontline Disruptor Strategy
Balmond should position himself slightly in front of the team, ready to absorb damage and disrupt the enemy’s formation.
-
Use Skill 1 Defensively: Do not waste Soul Lock to initiate the fight. Hold it to use against an incoming enemy assassin (like Fanny or Ling) to knock them away from your squishy backline marksman.
-
Continuous Damage Focus: Your primary job is to maintain pressure with Cyclone Sweep on the enemy’s front-line fighters or tanks. The persistent, escalating damage is often enough to force them to retreat or reposition.
-
Target the Backline: While you are spinning, reposition yourself to catch as many of the enemy’s crucial backline heroes (Mage/Marksman) in the Cyclone Sweep radius as possible.
B. The Ultimate Execution Timing
Timing the Lethal Counter is the difference between a wasted ultimate and a devastating team wipe.
-
The Finisher: Use the ultimate only when enemy heroes are at $40\%$ HP or less. The true damage based on missing HP makes it exponentially more powerful as an execution tool.
-
Aim for Multiple Targets: Position yourself so the ultimate hits the two or three lowest-HP enemies simultaneously, maximizing the chance of getting multi-kills and triggering your passive healing chain reaction.
-
Objective Steal Watch: Always keep an eye on the Lord and the Turtle. If your jungle is alive, position yourself to use your ultimate on the objective at the precise moment its HP is critically low.
C. The Passive Healing Chain (The Balmond Clutch)
The true mastery of Balmond comes from chaining his passive healing during chaotic encounters.
-
Kill Confirmation: Always prioritize securing the kill on the lowest-HP target, even if it means momentarily disengaging from the main fight, because the $20\%$ HP recovery is more valuable than any raw damage.
-
Minion Reset: If a team fight is taking place near a minion wave, use a quick Cyclone Sweep to clear the minions, giving you a quick $5\%$ HP burst, which can be the difference between life and death.
-
The Final Push: After securing a kill and healing, immediately re-engage the remaining enemies. Your renewed HP pool will shock opponents who thought they had secured a victory.
Pillar 5: Balmond’s Counter Strategy and Advanced Tips
Even the Berserker has weaknesses, and a true Balmond master knows how to mitigate his counters and exploit advanced techniques.
A. Balmond’s Primary Counters
Balmond struggles against heroes who can deal massive damage from a distance or apply continuous crowd control (CC) that interrupts his spin.
-
Long-Range Burst Mages: Heroes like Eudora or Aurora can burst Balmond before he can heal, dealing damage from outside his Cyclone Sweep range. Counter with Athena’s Shield and smart positioning in the brush.
-
Heavy CC Heroes: Heroes like Kaja (suppress) or Franco (hook) can prevent Balmond from spinning, nullifying his primary damage and healing source. Counter with Tough Boots (for resilience) and careful anti-CC positioning.
-
Sustain Dealers: Heroes who can sustain longer than Balmond, like Esmeralda (shield stealing), can often win a prolonged 1v1 fight. Avoid direct, sustained duels with these opponents unless you have a clear item advantage.
B. Advanced Movement and Combo Techniques
These tricks elevate Balmond from a simple spinner to a terrifying threat.
-
Skill 1 + Flicker Escape: You can use the Flicker battle spell immediately after casting Soul Lock to extend the knockback distance or change the direction of your dash unexpectedly, catching enemies off guard.
-
The “Spin and Run” Bait: Use Cyclone Sweep and deliberately walk towards the enemy’s turret. This forces them to retreat, giving you free farm and pressure, without committing to the risky dive.
-
The Double Kill Passive Bait: When two enemies are chasing you and you are low on HP, wait until one is at critical HP, execute them with your ultimate for the $20\%$ HP heal, and then immediately fight the remaining enemy with your replenished health.
C. Emblem Customization (The Final Edge)
Choosing the right talent in the Fighter Emblem or Tank Emblem can significantly boost Balmond’s performance.
-
The Festival of Blood (Fighter): This talent grants massive Spell Vamp upon getting kills, stacking perfectly with the Bloodlust Axe and Balmond’s passive to maximize healing, making this the ideal offensive choice.
-
Concussive Blast (Tank): This provides an occasional burst of AOE damage and slows nearby enemies, offering utility and extra pressure when you need to be a pure tank.
-
Bravery and Invasion: Always prioritize the early points in Bravery (Physical Attack) and Invasion (Physical Penetration) in the first tier of the emblems for strong early-game trading power.
Conclusion: The Unstoppable Force of the Berserker

Mastering Balmond is a deeply rewarding experience that hinges on patience, strategic timing, and a complete understanding of his unique self-sustaining toolkit. His effectiveness does not come from high-speed, intricate mechanical skill but rather from clever positioning and the calculated use of his massive area-of-effect abilities. The key to becoming an unstoppable Balmond player lies in leveraging his passive ability to continuously heal by clearing waves and jungle camps, ensuring he is always ready for the next skirmish.
His ultimate, Lethal Counter, must be seen purely as a surgical execution tool, maximizing its missing HP damage to secure kills and trigger that vital $20\%$ health recovery. Balmond’s versatility allows him to dominate the EXP lane in the early game and transition into a formidable frontline disruptor and objective stealer in the late game. By adhering to the optimal build—prioritizing Bloodlust Axe and Oracle—you will unlock the true potential of the Berserker.
This journey demands a shift in mindset, favoring sustained presence over risky one-shot combos. The ability to endure enemy damage and regenerate health in the middle of a chaotic team fight is Balmond’s signature strength. His straightforward mechanics make him accessible, yet his strategic depth ensures he remains viable even at the highest tiers of play. Embrace the axe, master the spin, and watch as the enemy team realizes too late that they are fighting an unstoppable, self-healing behemoth.